As a veteran tactician who has guided countless students through the tangled politics of Fódlan, I can say with certainty that few moments in Fire Emblem: Three Houses make my heart pound like facing the Death Knight. This scythe‑wielding nightmare is a lightning bolt wrapped in armor, ready to fry any mage who dares to blink. You spot him early in the game, perched on a tile that laughs at your attacks, and immediately you know—this is not a boss you can bulldoze with brute force. Yet, over the years and many playthroughs, I have refined a surgical approach that turns this grim reaper into a stepping stone. Whether you are a first‑time professor in 2026 or a returning commander polishing your Maddening run, the following strategies will help you claim the elusive Dark Seal without losing a single student.
The Death Knight: Why He Haunts Us
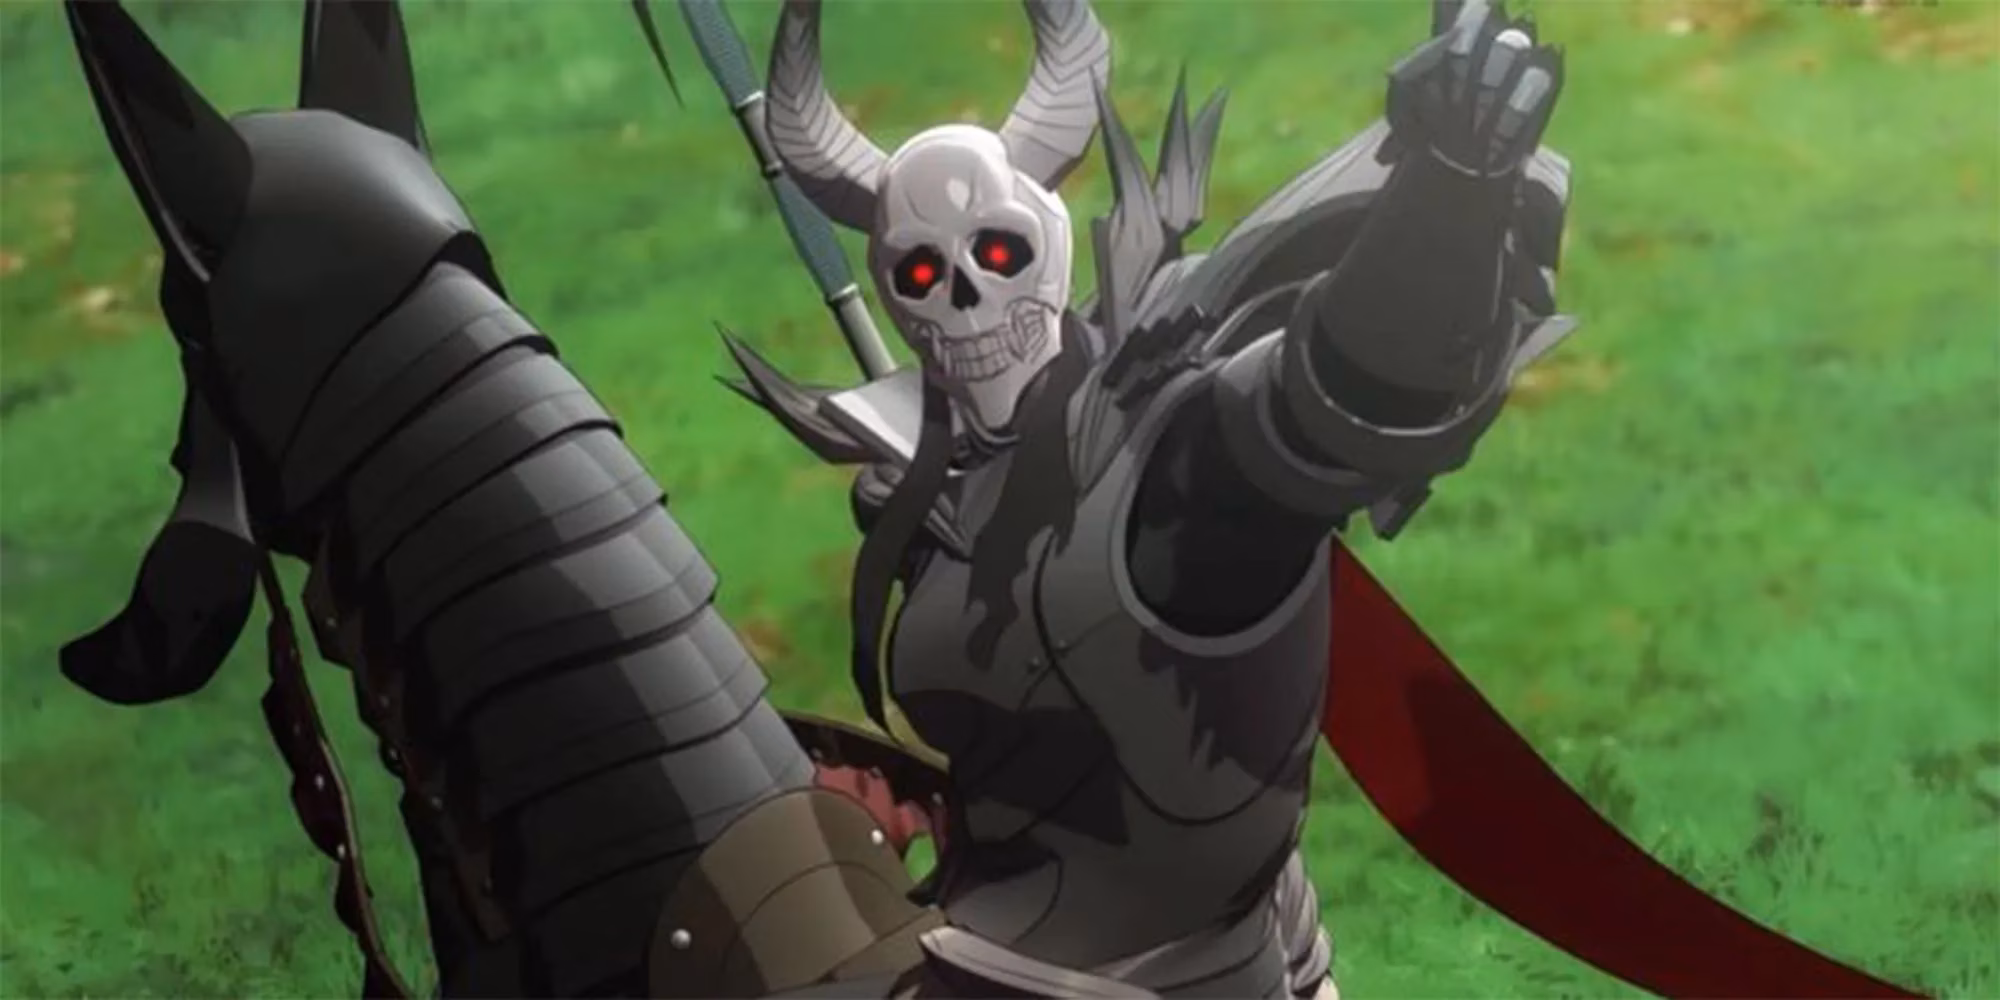
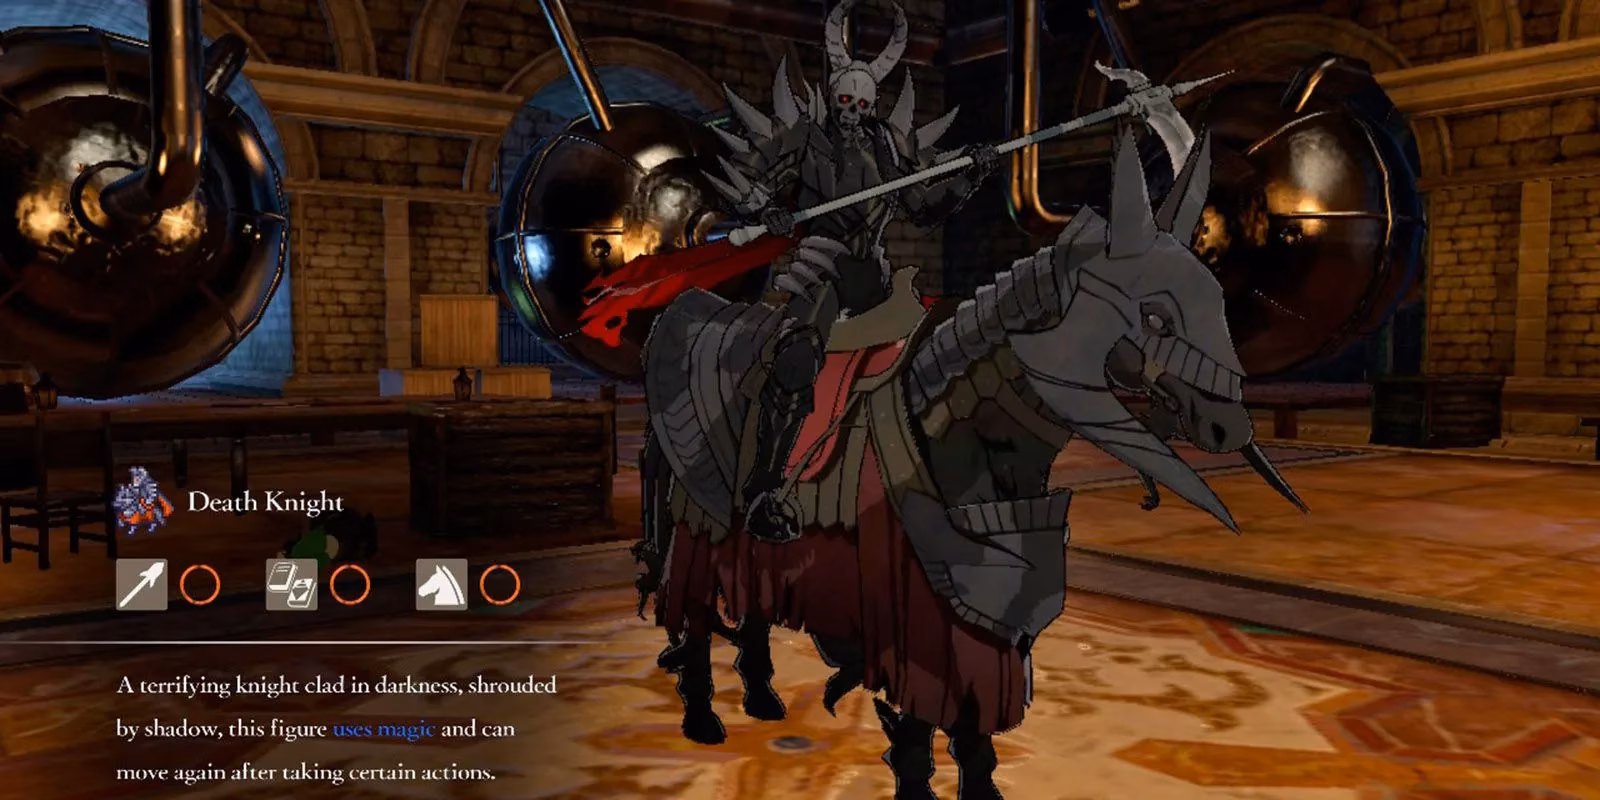
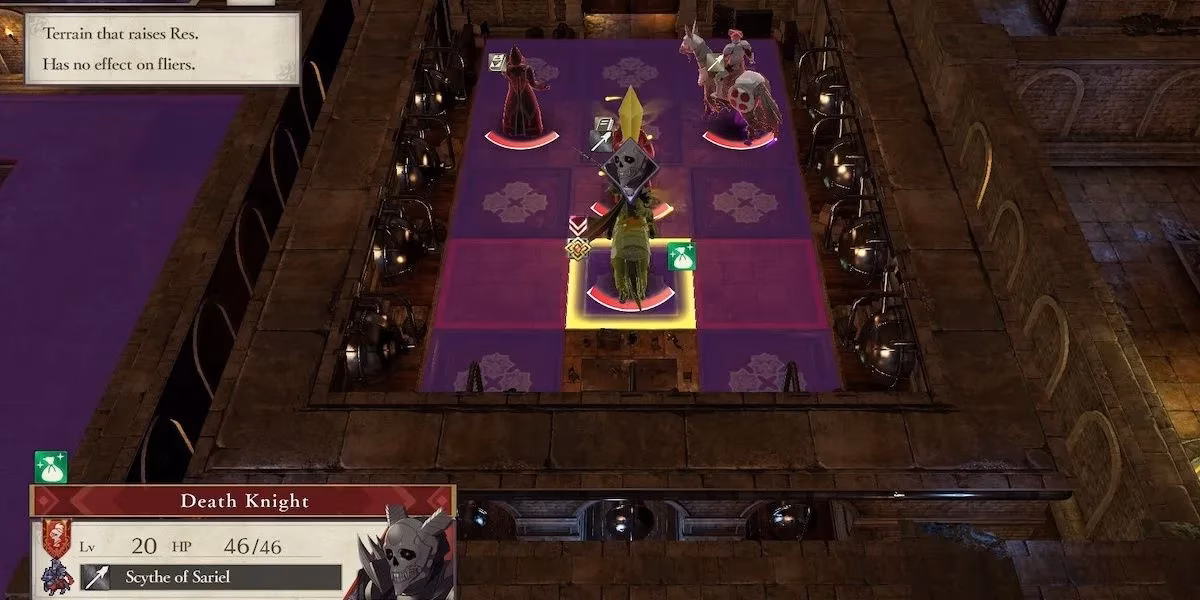
The Death Knight is not merely a tough enemy; he is a design that punishes complacency. Every swing of his weapon deals catastrophic damage, and his speed ensures that most of your units will not double him—indeed, he often doubles them. If you blunder into his range without a plan, you will watch a cherished character evaporate in a counterattack. What makes him especially cruel is that he appears as early as Chapter 4, when your students are still fumbling with iron weapons. Yet the developers left a poetic weakness: he rides a horse, and that makes him vulnerable to anti‑cavalry tools. Think of his mount as his Achilles heel, and your task is to deliver a surgeon’s scalpel to that exact spot.
When you do fell him, he drops a Dark Seal, a rare item that lets a male unit reclass into Dark Mage or Dark Bishop. For mages like Hubert, who already dabble in shadow, this is pure gold. If you do not care about the class, you can avoid the fight entirely in Chapters 6 and 8—both encounters are optional. But for those of us who chase every advantage, learning to defeat him early is an act of pride.
Lay the Foundation: Gambits and the Speed Check
My first lesson to any new professor is this: never let the Death Knight counterattack on his own terms. The most elegant solution is a gambit. Assign an offensive battalion to your chosen attacker and unleash the gambit before moving in for the kill. A gambit not only chips away at his health—like chipping at a granite statue with a diamond‑tipped chisel—but also applies a Gambit Boost that reduces your chance of missing, which could be fatal. More importantly, a unit struck by a gambit cannot counterattack for the rest of that turn. This creates a safe window for your finisher to land a clean hit.
Before you even think about engaging, check your unit’s Speed stat. The Death Knight is alarmingly fast; if the character delivering the final blow has a Speed below ten, you risk being doubled—or worse, failing to outspeed him at all. I always equip my attacker with a shield that does not weigh them down too much, or I plant a Rally Speed user nearby. The goal is to ensure that your gambit‑softened Death Knight never gets a chance to swing back.
Feast Before the Fight: Meal Boosts
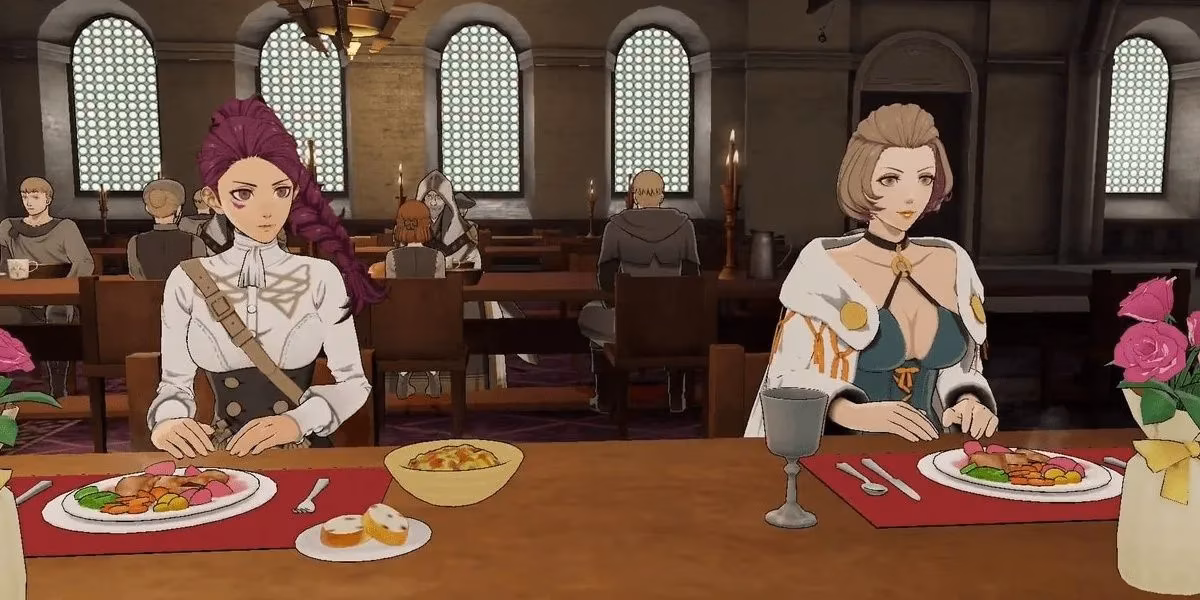
One of the most underrated pre‑battle rituals is the shared meal. Whenever I have free time in the calendar, I drag my key fighters to the dining hall and cook up dishes that spike Strength, Magic, or Defense. These buffs last the entire month, so they stack beautifully with the day of the Death Knight skirmish. If I plan to use Lysithea, I prioritize a Mag‑boosting meal; if I am relying on a lance‑wielding Knightkneeler, I go for Strength. The monastery’s kitchen becomes my war tent, and the aroma of sautéed pheasant is the scent of impending victory.
In 2026, we have even more data on meal combinations thanks to community spreadsheets. The “Saghert and Cream” dish, for instance, grants +1 Speed—perfect if you are teetering on that crucial ten‑Speed threshold. Every little edge counts when you are staring down a scythe.
The Magic Bullet: Lysithea and Tank Bridging
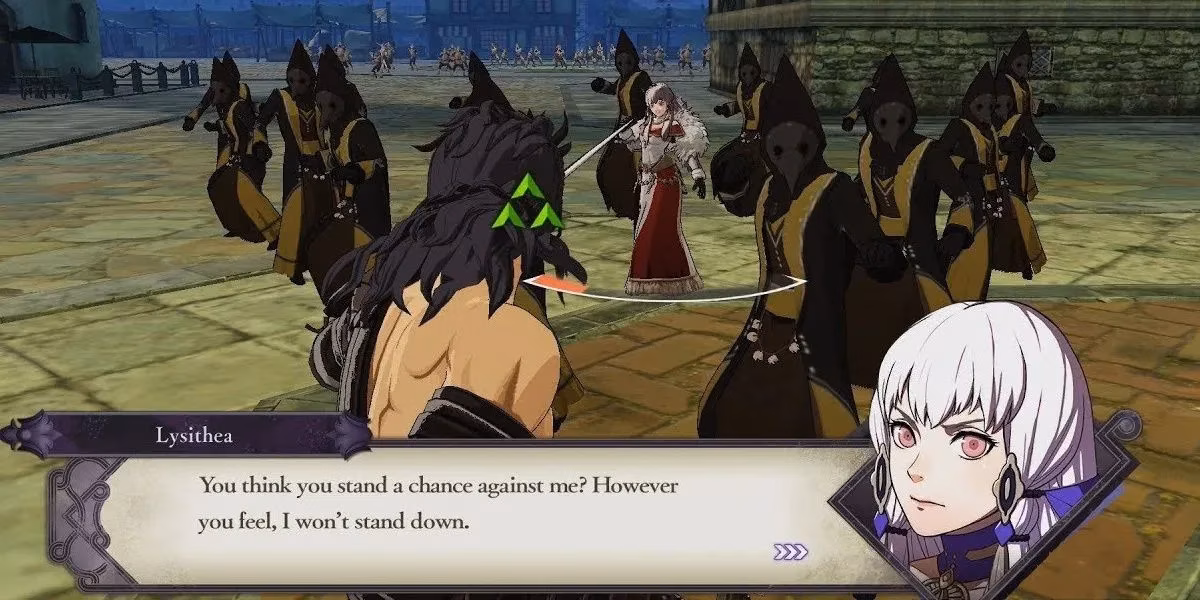
If there is one student who makes the Death Knight a joke, it is Lysithea von Ordelia. Her budding talent in Reason unlocks Dark Spikes Τ, a spell that deals effective damage against cavalry. With a B rank in Reason—achievable by Chapter 4 if you tutor her relentlessly and shower her with gifts—she can delete the Death Knight in a single cast. I have seen her vaporize him so thoroughly that I imagine her spell as a magic‑powered anti‑tank missile, homing in on the horse beneath him.
However, Lysithea is as fragile as a porcelain doll. To use her safely, I either soften the Death Knight with a gambit first or have a dedicated tank absorb his opening attack. Units like Dedue (Blue Lions) or Edelgard (with a heavy shield) can withstand one round and retaliate weakly, leaving the boss primed for Lysithea’s follow‑up. If you missed recruiting her and chose the Black Eagles, Hubert can eventually learn Dark Spikes, but he needs a grueling A rank in Reason, so I rarely rely on him for early kills.
The Steel Point: Knightkneeler Art
For those who prefer a non‑magical solution, the Combat Art Knightkneeler is a revelation. By training a unit’s Lance skill to C rank, you unlock this anti‑cavalry attack. The trick is to pair it with a weapon that has at least 15 Might—a Steel Lance does the job perfectly. I think of Knightkneeler as a fencer’s lunge, precisely aimed to pierce the horse and rider in one motion. Combine this art with an offensive battalion and the Gambit Boost trick, and even a relatively average unit like Sylvain or Leonie can deliver the killing stroke.
Equip the Knightkneeler user with a battalion that grants extra Hit and avoid, and do not neglect to position them on terrain that negates the Death Knight’s tile advantage. In the first encounter, the boss stands on a tile that boosts his resistance; pulling the lever in the Northern Warp Room removes that boon and makes him far more mortal.
Final Warnings and Pro Tips
Over the years, I have learned a handful of commandments that never age. First, always kill the Death Knight before cleaning up the rest of the map; if you defeat the commander or the last generic enemy first, the mission ends and you lose your chance. Second, if the battle goes sideways, use Divine Pulse to reset the turn rather than accepting a death—especially on Classic Mode, where a lost unit is gone forever. Third, do not underestimate the power of the Steal skill. If you have a thief like Ashe or Petra with high Speed, you can simply swipe the Dark Seal and retreat without a fight; this is a pacifist’s dream.
Finally, remember that the Death Knight is meant to intimidate new players. He is the dev team’s way of whispering, “You cannot just mash Attack.” But once you crack his pattern—gambit shackle, stat check, and timely anti‑cavalry hit—he becomes a training dummy for your sharpest students. In 2026, with all DLC characters available and a wealth of community knowledge, you have more tools than ever. Treat each encounter as a puzzle, and soon you will find yourself collecting Dark Seals like postcards from a very morbid vacation. Your future dark mages will thank you.